A fantastic user experience can only be achieved by including animation in mobile apps. The most difficult task is explaining the app’s logic to consumers. The prevalent error, however, is the careless usage of animation, which defeats the purpose of enhancing the user experience.
The animation needs to be well integrated and shouldn’t be extraneous for an app to be considered exceptional rather than merely decent or average. Because they are in motion, things rarely come to a complete stop right away. You may simulate real motion in your UI with animations.
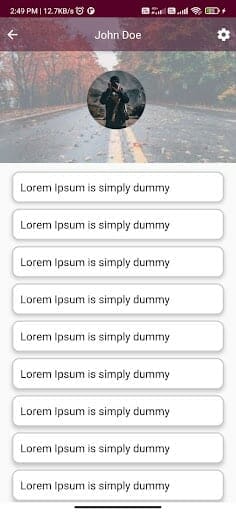
This article uses ScrollView and native React animation to build a profile header animation. We’ll have the animated profile view after this blog post.
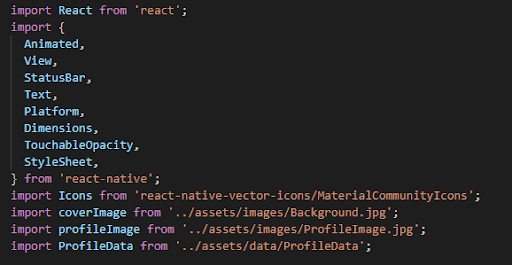
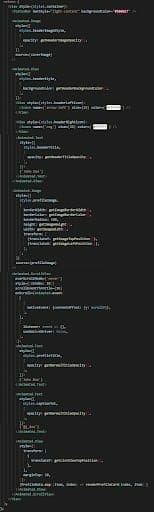
Import View and Animated from react native are the two most important components to achieve animation to a particular view for our animated profile view that supports layout with flexbox, style, some touch handling, and accessibility controls and animation views.
Without these two components, we must import images from our assets folder and Dimension from react native for an accurate response to the app.
A key component of this animation’s implementation is interpolation. Interpolation can be applied to each property first. An interpolation normally uses linear interpolation but also includes easing functions to convert input ranges into output ranges. It extrapolates the curve past the specified ranges by default, but you may also have it clamp the output value.
We use Interpolate for changing position, size, and colors and Animated. event() to map the ScrollView position with animated state value. You can read more details about Interpolate and Animated event.
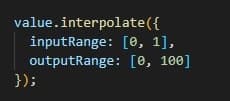
A basic mapping to convert a 0-1 range to a 0-100 range would be:
Create a header and offset its position in the ScrollView’s top to go over the scroll view. After that, interpolating the header using the ScrollView scroll position is a simple process.
So let’s get an understanding with our example:
Here, scrollY was taken in the useState where its value was new Animated.Value(0). This was an initial value for each component animation; after that, we had to add our values according to our requirement.
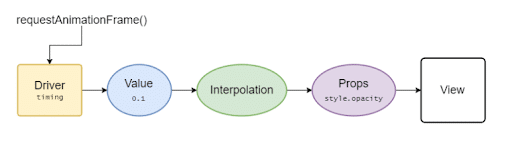
Animated API was developed with serializability as a key constraint. As a result, we can provide native code with all of the animation’s information before the animation begins, enabling native code to execute the animation on the UI thread without passing via the bridge at each frame.
It is especially useful since, after the animation has started, the JS thread can be blocked without affecting how smoothly it progresses. This happens rather frequently because user code runs on the JS thread, and React renders have the potential to lock JS for a long time.
When using Animated, you first describe a graph of nodes that correspond to the animations you wish to do. Then you use a driver to update an Animated value according to a predetermined curve. By using the Animated event to link an Animated value to a View event, you may also update an Animated value.
Set useNativeDriver:true consistently while configuring animations. Avoiding the back-and-forth over the bridge between JS code and native code for each rendered frame, it will make your animations fluid.
Due to restrictions imposed by React-Native, useNativeDriver currently does not support the position absolute. So, we use the converted attribute there. We utilize translateY for the top and translateX for the left.
Animated.event() method map the state scrollY with ScrollView’s Y offset means Vertical offset.
The scrollEventThrottle regulates the frequency with which the scroll event is fired while scrolling (as a time interval in ms). A lower value improves tracking the scroll position precision, but the amount of data being carried over the bridge may cause issues with scroll performance.
Due to the JS run loop being synced to the screen refresh rate, you won’t notice any difference in performance with values set between 1 and 16.
It’s time to use interpolation to animate the profile image from the center of the screen to the header left. In order to create an appropriate animation inside of our application, we provided some value to animate each position.
Full Example :
Interpolation can be applied to each property first. An interpolation normally uses linear interpolation but also includes softening functions to convert input ranges into output ranges. It extrapolates the curve past the specified ranges by default, but you may also have it clamp the output value.
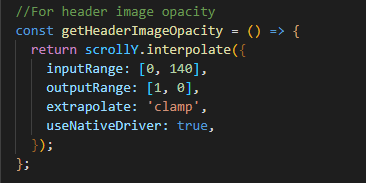
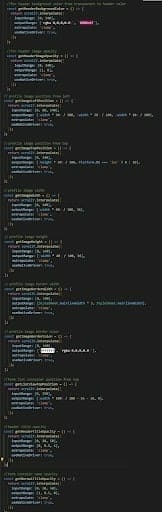
Here, from input range 0–80, our image changes the position from 30 to 38 relative to devise width, and from 80–140, it will be from 38 to 10 relatively.

interpolate method called when the state value is changed from ScrollView’s onScroll mapping that we have done before.
Same as the position left, we set position top, Image height, and width per ScrollView’s scroll position. Now set these values in the style of Animated.Image as below:
Now when the user scrolls the ScrollView the onScroll method will call, and our state scrollY will change, and when the stateY changes, interpolate will call, and the beautiful animation is done.
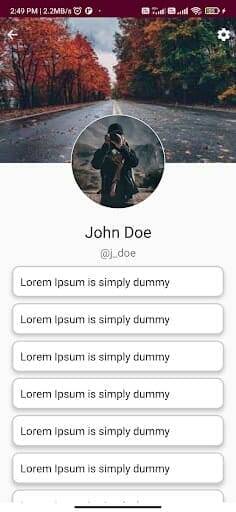
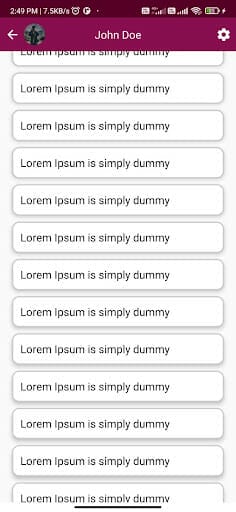
Screen Shots
Screen Record

In this blog, we saw and implement the Animated Profile Toolkit and how to use our projects for beautiful animation in project UI.
Leave your competitors behind! Become an EPIC integration pro, and boost your team's efficiency.
Register Here

The Mindbowser team's professionalism consistently impressed me. Their commitment to quality shone through in every aspect of the project. They truly went the extra mile, ensuring they understood our needs perfectly and were always willing to invest the time to...

CTO, New Day Therapeutics
I collaborated with Mindbowser for several years on a complex SaaS platform project. They took over a partially completed project and successfully transformed it into a fully functional and robust platform. Throughout the entire process, the quality of their work...

President, E.B. Carlson
Mindbowser and team are professional, talented and very responsive. They got us through a challenging situation with our IOT product successfully. They will be our go to dev team going forward.
Founder, Cascada
Amazing team to work with. Very responsive and very skilled in both front and backend engineering. Looking forward to our next project together.

Co-Founder, Emerge
The team is great to work with. Very professional, on task, and efficient.

Founder, PeriopMD
I can not express enough how pleased we are with the whole team. From the first call and meeting, they took our vision and ran with it. Communication was easy and everyone was flexible to our schedule. I’m excited to...

Founder, Seeke
Mindbowser has truly been foundational in my journey from concept to design and onto that final launch phase.

CEO, KickSnap
We had very close go live timeline and Mindbowser team got us live a month before.

CEO, BuyNow WorldWide
If you want a team of great developers, I recommend them for the next project.

Founder, Teach Reach
Mindbowser built both iOS and Android apps for Mindworks, that have stood the test of time. 5 years later they still function quite beautifully. Their team always met their objectives and I'm very happy with the end result. Thank you!

Founder, Mindworks
Mindbowser has delivered a much better quality product than our previous tech vendors. Our product is stable and passed Well Architected Framework Review from AWS.

CEO, PurpleAnt
I am happy to share that we got USD 10k in cloud credits courtesy of our friends at Mindbowser. Thank you Pravin and Ayush, this means a lot to us.

CTO, Shortlist
Mindbowser is one of the reasons that our app is successful. These guys have been a great team.

Founder & CEO, MangoMirror
Kudos for all your hard work and diligence on the Telehealth platform project. You made it possible.

CEO, ThriveHealth
Mindbowser helped us build an awesome iOS app to bring balance to people’s lives.

CEO, SMILINGMIND
They were a very responsive team! Extremely easy to communicate and work with!

Founder & CEO, TotTech
We’ve had very little-to-no hiccups at all—it’s been a really pleasurable experience.

Co-Founder, TEAM8s
Mindbowser was very helpful with explaining the development process and started quickly on the project.

Executive Director of Product Development, Innovation Lab
The greatest benefit we got from Mindbowser is the expertise. Their team has developed apps in all different industries with all types of social proofs.

Co-Founder, Vesica
Mindbowser is professional, efficient and thorough.

Consultant, XPRIZE
Very committed, they create beautiful apps and are very benevolent. They have brilliant Ideas.

Founder, S.T.A.R.S of Wellness
Mindbowser was great; they listened to us a lot and helped us hone in on the actual idea of the app. They had put together fantastic wireframes for us.

Co-Founder, Flat Earth
Ayush was responsive and paired me with the best team member possible, to complete my complex vision and project. Could not be happier.

Founder, Child Life On Call
The team from Mindbowser stayed on task, asked the right questions, and completed the required tasks in a timely fashion! Strong work team!

CEO, SDOH2Health LLC
Mindbowser was easy to work with and hit the ground running, immediately feeling like part of our team.

CEO, Stealth Startup
Mindbowser was an excellent partner in developing my fitness app. They were patient, attentive, & understood my business needs. The end product exceeded my expectations. Thrilled to share it globally.

Owner, Phalanx
Mindbowser's expertise in tech, process & mobile development made them our choice for our app. The team was dedicated to the process & delivered high-quality features on time. They also gave valuable industry advice. Highly recommend them for app development...

Co-Founder, Fox&Fork