A website that is not regularly updated will produce different results than one that is. A CMS (content management system) allows users to easily edit, change, or delete any text, image, audio, or video from a website with no hassle. A CMS will enable you to keep your website current and lead to a significant increase in your business.
CMS Webflow is one of the best interfaces for content management that allows users to have complete control over different processes without the need for coding knowledge.
This article provides a comprehensive understanding of how CMS Webflow works and how it benefits you and updates websites with the proper guidance of a Webflow Agency.
Webflow is a platform that allows users to design, build, and publish websites visually without writing any code. It includes a drag-and-drop interface for creating and styling web pages and tools for adding functionality like forms, slideshows, and e-commerce capabilities. Webflow also offers to host published websites, making it a complete solution for building and maintaining websites.
Webflow is particularly popular among designers and creative professionals who want to control their websites’ look and feel but don’t necessarily have the coding skills or resources to build them from scratch. It’s also used by businesses and organizations to create professional-looking websites quickly and easily.
With CMS Webflow you can manage and update without writing a single line of code. You have complete control over how your control is structured and displayed in your project.
The “visual” content management system (CMS) from webflow enables you to create, design, and update structured content without writing a single line of code. Websites that use a CMS only have to update dynamic content once, and then it will automatically be updated on all the pages where it’s used. This is much more efficient than having to update each page separately.
Related Read: Introduction To Webflow CMS
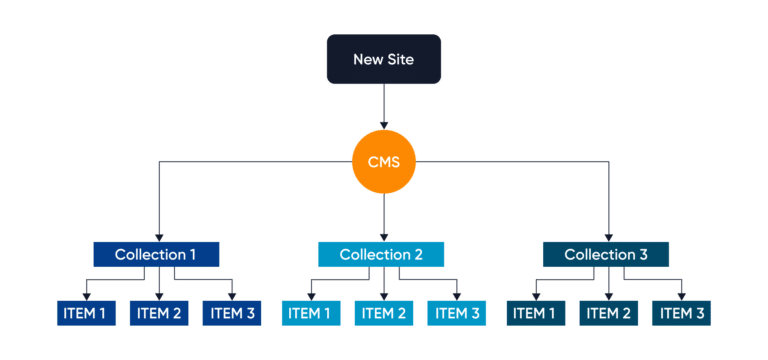
Structuring your collections is a matter of defining entities and then creating relationships between those entities within the context of the websites. When creating your collections, it can be helpful to understand how these entities relate to the real world. Still, ultimately, the relationships between things in your collection aren’t important until you start using them to design something.
In the structure, the aspect we have is the site. The site is nothing but the website you are trying to build. It can be a blog, landing pages, an e-commerce site, etc. Every site will have its own CMS. And the next important thing has a collection.
A collection works as a database where we can store our content. This content is used throughout our project programmatically. Finally, we have the items. The items here are the individual data records in each collection.
Let’s understand this structure with a basic example. Suppose you want to create a website that sells books online. You will have to start with creating a new site on Webflow.
Now the CMS here will act as the central repository where all the books will be stored. But as we know, books have different genres like horror, fictional, non-fictional or mystery. We can use collections to define our books categorically.
Therefore, the items can be the individual books present in that collection. So one can leverage this simple CMS structure of your flow to create a CMS which handles their needs. As mentioned earlier, Webflow also allows you to build your website.
You can combine this CMS functionality with a website builder to create a full-fledged website all in one place. You can also use Webflow as headless CMS. The head represents the content in the front end, and the body represents the back end. Headless CMS is where the head, i.e., the front end of the client side, is removed only using the body that is the backend.
This means you can host your content elsewhere and use the flow only as a database. To achieve this, there is a developer portal in Webflow where you can find every API. These APIs can talk to Webflow CMS, and you can easily display your data on any device, be it mobile or desktop.
1. After understanding the content structure in Webflow, we will be looking at how it works and how we can create the site CMS collection and the items. Let’s jump to the Webflow website.
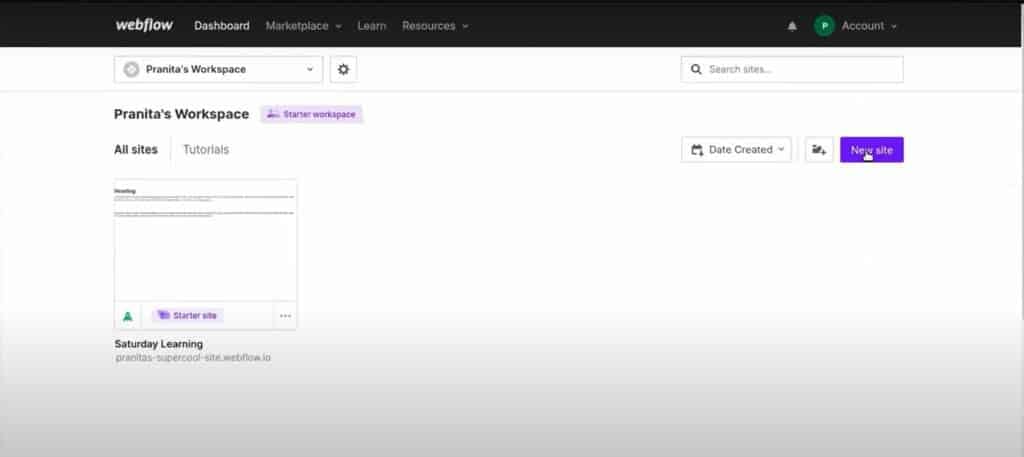
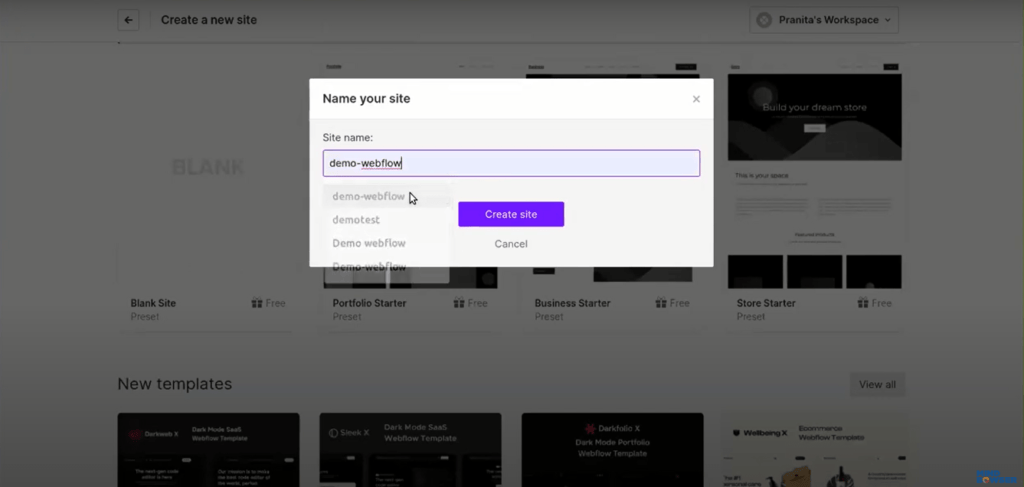
2. After logging into the webflow website. To create a site, go to the dashboard and click on the “new site” button. You are taken to many templates when you click the button. We will start with a blank template to make you understand every aspect of Webflow.
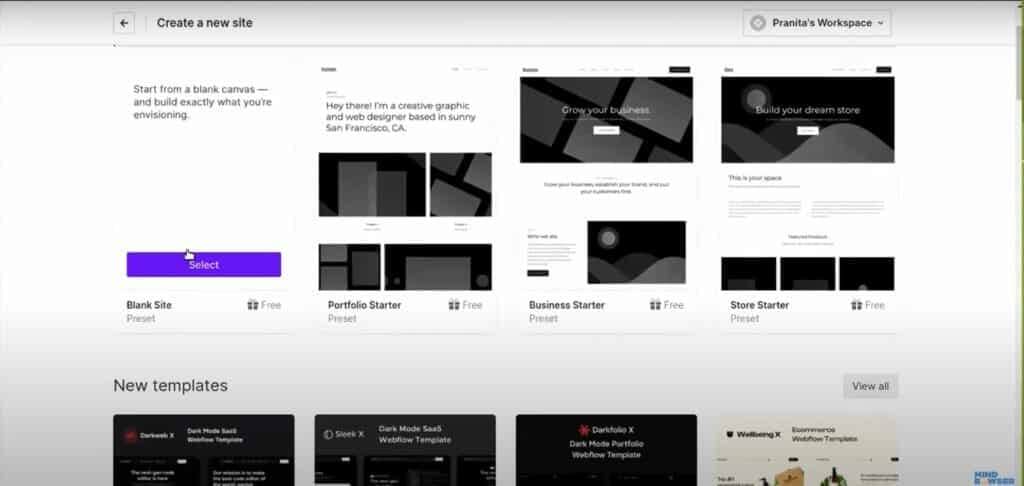
3. Click on the blank template and name your website. Next, click on “create site” to start the process.
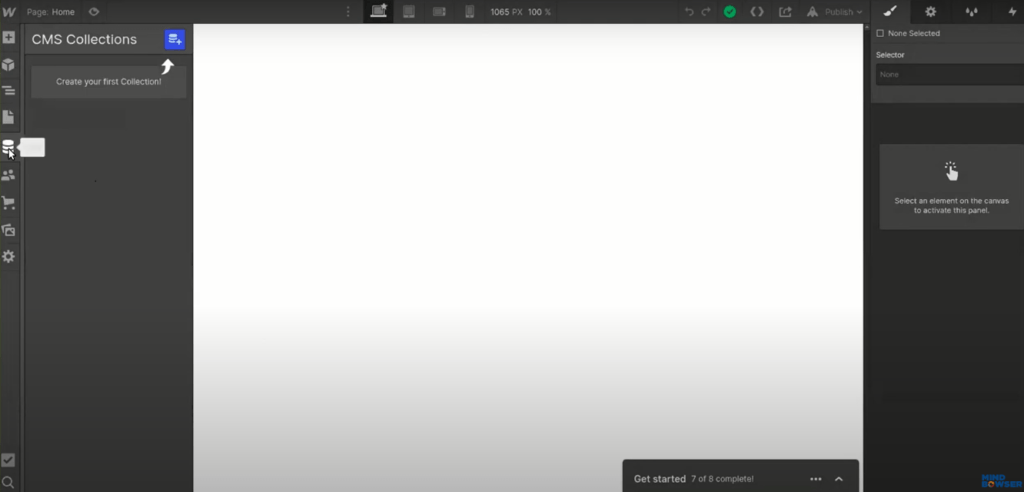
4. To create the CMS solution, click on the “CMS” icon.
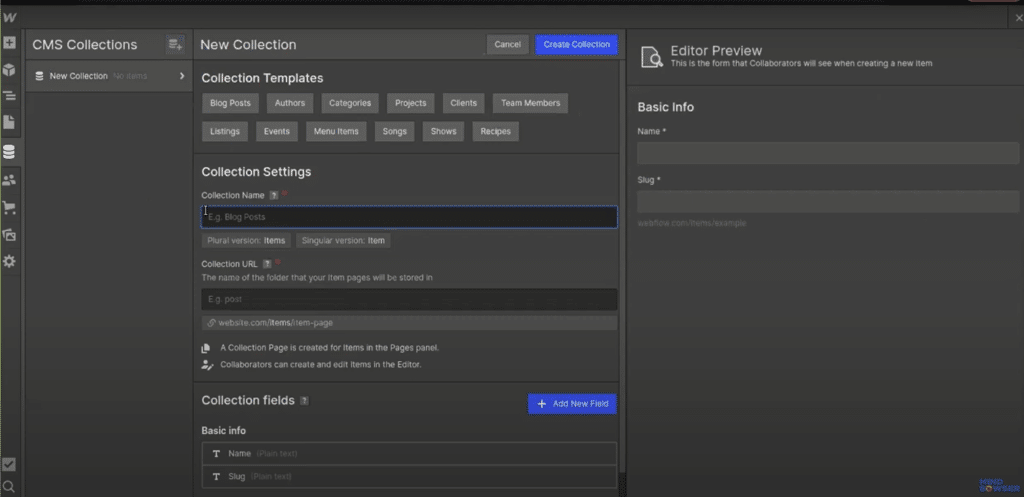
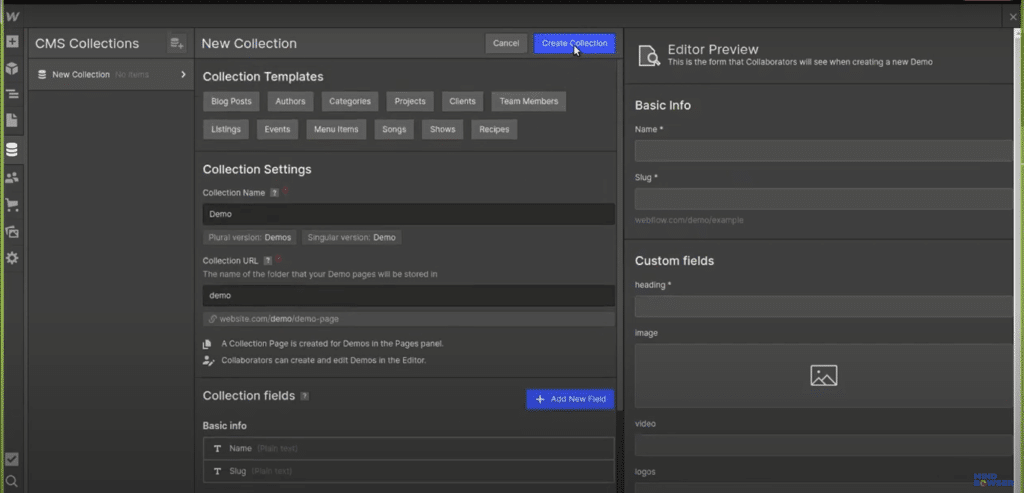
5. We will now create a collection in CMS. Click on the “plus” icon and name the collection. Our web page will have multiple data types, like image, multi-image, plain text, etc. Webflow allows us to add the field of the various data types and the custom field.
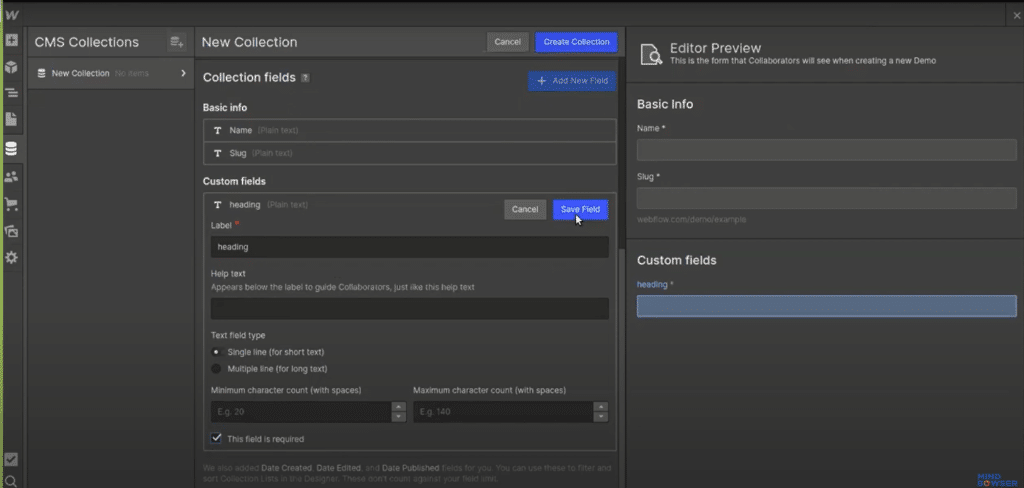
6. Click on add field, which is under customization field.

7. Click on the plain text to create a custom field. You need to give a name to the field. Here we have given the name “heading.” On this heading, Webflow will provide us with the limitation of this field like maximum or minimum character count. If you want, you can mention the maximum and minimum character count. Lastly, click on the “check box” and “Save” the field.
8. You can add multiple customized fields to your Webflow CMS collection. After this, we will add an image. Click on the “image” button and again give a label name. Like the plain text, you can add limitations to the image like maximum image size, width or height. If the field is required, click on the “required check box” and “Save.”
9. If you don’t have any content at the beginning of the website, Webflow has the feature of adding dummy data in the collection item. You get options as below,
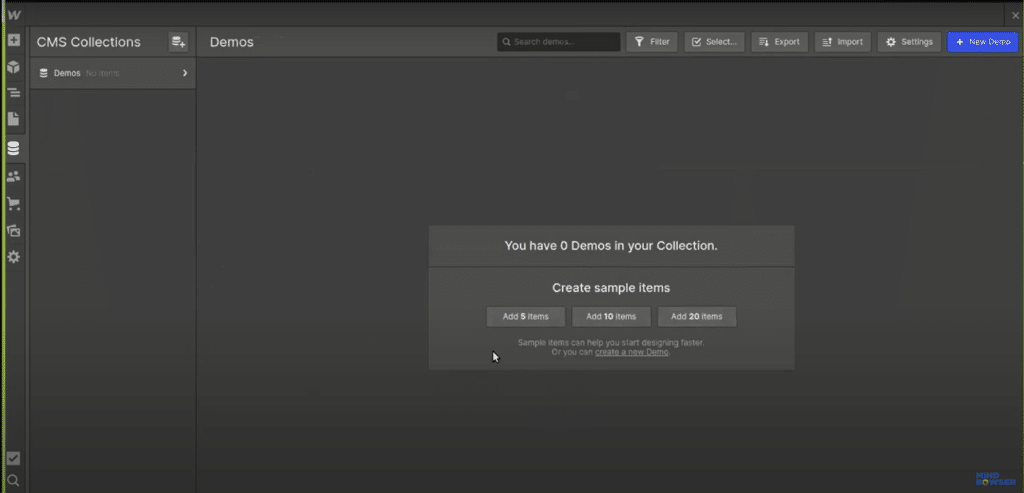
10. For now, we will select the “five items” button.

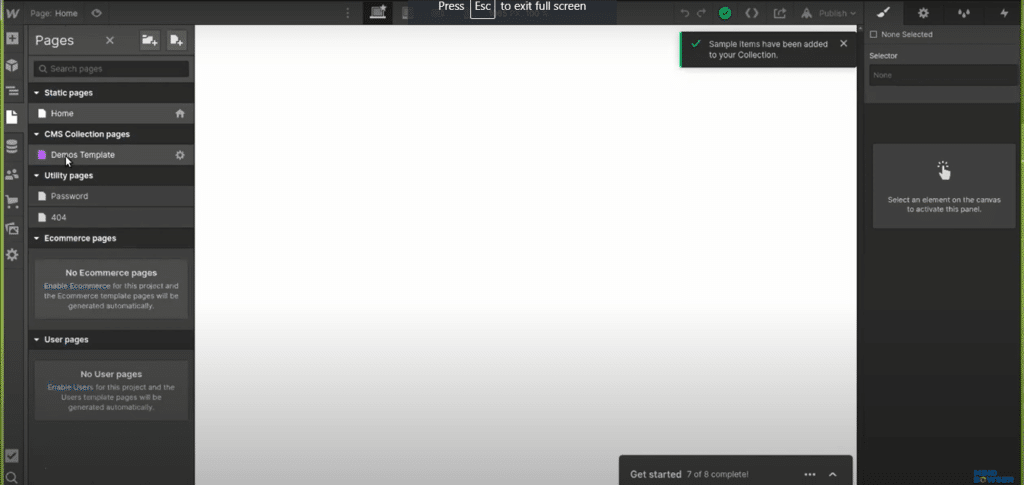
11. As you can see in the above image, Webflow added dummy data. When you click on the first item, you see the customized screen with the heading, image and video.

12. You can edit this data easily. You can replace any items with any other items or URLs. To add a logo, you can click on “Multiple images” and select the desired images for the logo.
13. After editing your items, click on the “Save” button.
14. With Webflow you can easily manage and create your website in one flow. To create a website and map this data on the website, click on the “Plus” icon.

You are exposed to multiple options like layout, basic typography, CMS collection and other media items.
15. To integrate the CMS data into the website, click on the “Plus” icon on the top left. Click on “Home Page” and click on the CMS collection you created.
16. Add the layouts as per the CMS collection items to the page. Here we are adding a heading, so click on the “Get text from the (name of the collection)”
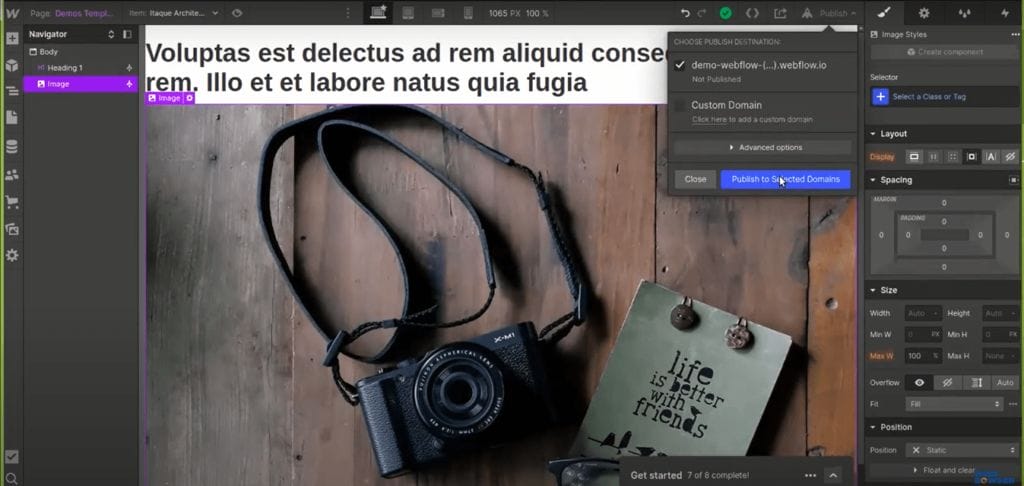
You can manage the CSS from the dashboard itself easily. After integrating the data from the CMS and managing the data, you can now publish the website
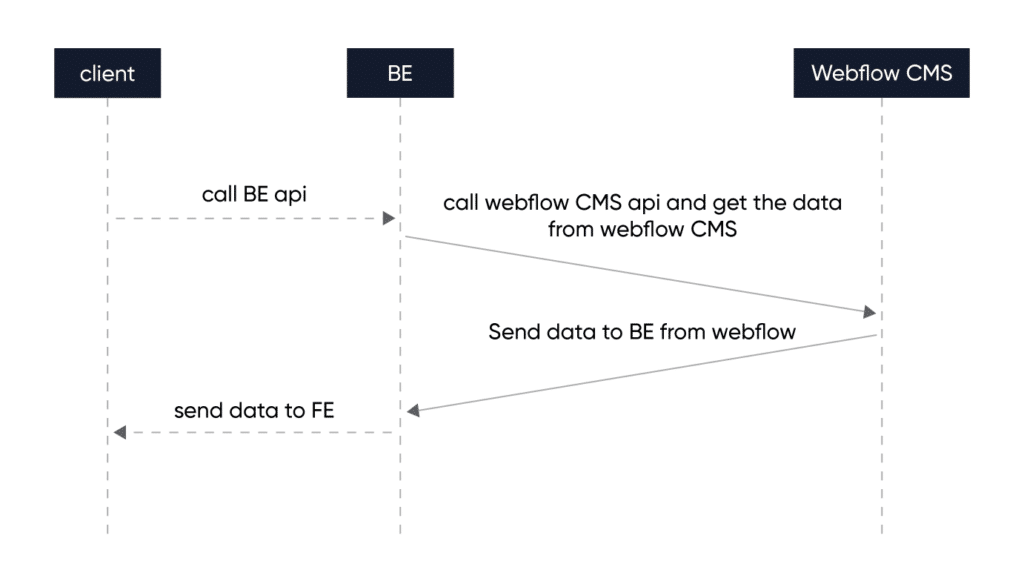
In this use case, there are three modules- client-side, back end, and CMS Webflow. The client side, our content, will call the back-end API; similarly, the further back end will call the Webflow CMS API. This will get the latest data store in the Webflow CMS.
We need to integrate the Webflow CMS API in the back end, which will get the updated data. To understand the whole process deeply, you can see the video below.
After understanding the content structure and how to create one, let’s deep dive into the advantages and disadvantages of Webflow;
🟢 Advantages:
👍 It offers many features, including a website builder, templates, CMS, eCommerce tools, and more. You will be able to create a website that’s perfect for your business, no matter what industry you are in.
👍 The design tools available are so powerful that they rival anything you can do with code.
👍 Webflow provides security hosting for any website or application.
👍 It’s easy to use and provides a powerful feature to build your website.
👍 Webflow is a responsive website builder with multiple screen sizing options and an easy-to-use interface.
👍 Webflow has a built-in google analytics integration.
👍 You don’t have to code a separate dashboard for the marketplace website. You can use the existing one and customize it to fit your needs.
👍 A wide variety of templates and layouts are available for users.
👍 You can easily integrate content into your website with the help of collection API.
🔴 Disadvantages:
👎 It has limited code customization.
👎 The plan variation can be confusing for your developers.
👎 Webflow’s editor can be overwhelming if you are unfamiliar with HTML and CSS.
👎 Some plans have traffic limits which can be frustrating when trying to get work done online.
👎 Not having enough online tutorials available can make it difficult to troubleshoot problems or figure out how to do something new.
Webflow and WordPress are both popular for building and managing websites, but they have some key differences that may make one more suitable for your needs than the other. It’s important to consider your specific needs and goals when deciding which platform to use.
▶️ There’s no 3rd party plugin support in webflow but it also helps to keep our website secure
▶️ Webflow offers better out-of-the-box performance optimization.
▶️ Webflow offers direct customer support for paying customers.
▶️ Webflow doesn’t have a huge plugin library like WordPress. While this makes things simpler, it’s also more limiting.
▶️ WordPress gives 3rd party plugin support but some plugins are very risky to use and not secure.
▶️ You can make WordPress sites load very fast, but it requires some manual effort.
▶️ WordPress doesn’t offer direct customer support (though it’s easy to find community support).
▶️ WordPress sites can feel more complicated because WordPress relies on plugins to add key features.
Related Read: WordPress Vs Reactjs: What Should You Choose?
Webflow and Joomla are both platforms that can be used to build and manage websites, but they have some key differences. Webflow is a good choice for users who want a visual editor and design-focused websites, and Joomla is a good choice for users who want more flexibility and a wider range of features.
✅ Webflow loads every website faster because of its better optimization.
✅ Webflow feature library has a lot easy to use features.
✅ Webflow support almost all browser which is mostly used on the internet.
✅ Webflow offers a lot of in-built customization options.
✅ Joomla can be slow to load,especially on large website.
✅ Joomla doesn’t offer as many features as Webflow.
✅ Joomla is not compatible with some of the most popular browsers.
✅ Joomla doesn’t offer as many customization options.
Webflow offers a range of pricing options for its website design and development platform. It currently offers four plans as follows;


CMS Webflow is a powerful and user-friendly website design and development platform that allows users to create professional quality websites without writing code. It offers a range of features and resources to help users design and build their websites, including a visual editor, templates and design resources. If you are looking for a platform to design and build your website, Webflow is worth considering.
You can watch our webinar video here if you want to dive deep into Webflow and how it works.

We worked with Mindbowser on a design sprint, and their team did an awesome job. They really helped us shape the look and feel of our web app and gave us a clean, thoughtful design that our build team could...

The team at Mindbowser was highly professional, patient, and collaborative throughout our engagement. They struck the right balance between offering guidance and taking direction, which made the development process smooth. Although our project wasn’t related to healthcare, we clearly benefited...

Founder, Texas Ranch Security
Mindbowser played a crucial role in helping us bring everything together into a unified, cohesive product. Their commitment to industry-standard coding practices made an enormous difference, allowing developers to seamlessly transition in and out of the project without any confusion....

CEO, MarketsAI
I'm thrilled to be partnering with Mindbowser on our journey with TravelRite. The collaboration has been exceptional, and I’m truly grateful for the dedication and expertise the team has brought to the development process. Their commitment to our mission is...

Founder & CEO, TravelRite
The Mindbowser team's professionalism consistently impressed me. Their commitment to quality shone through in every aspect of the project. They truly went the extra mile, ensuring they understood our needs perfectly and were always willing to invest the time to...

CTO, New Day Therapeutics
I collaborated with Mindbowser for several years on a complex SaaS platform project. They took over a partially completed project and successfully transformed it into a fully functional and robust platform. Throughout the entire process, the quality of their work...

President, E.B. Carlson
Mindbowser and team are professional, talented and very responsive. They got us through a challenging situation with our IOT product successfully. They will be our go to dev team going forward.

Founder, Cascada
Amazing team to work with. Very responsive and very skilled in both front and backend engineering. Looking forward to our next project together.

Co-Founder, Emerge
The team is great to work with. Very professional, on task, and efficient.

Founder, PeriopMD
I can not express enough how pleased we are with the whole team. From the first call and meeting, they took our vision and ran with it. Communication was easy and everyone was flexible to our schedule. I’m excited to...

Founder, Seeke
We had very close go live timeline and Mindbowser team got us live a month before.

CEO, BuyNow WorldWide
If you want a team of great developers, I recommend them for the next project.

Founder, Teach Reach
Mindbowser built both iOS and Android apps for Mindworks, that have stood the test of time. 5 years later they still function quite beautifully. Their team always met their objectives and I'm very happy with the end result. Thank you!

Founder, Mindworks
Mindbowser has delivered a much better quality product than our previous tech vendors. Our product is stable and passed Well Architected Framework Review from AWS.

CEO, PurpleAnt
I am happy to share that we got USD 10k in cloud credits courtesy of our friends at Mindbowser. Thank you Pravin and Ayush, this means a lot to us.

CTO, Shortlist
Mindbowser is one of the reasons that our app is successful. These guys have been a great team.

Founder & CEO, MangoMirror
Kudos for all your hard work and diligence on the Telehealth platform project. You made it possible.

CEO, ThriveHealth
Mindbowser helped us build an awesome iOS app to bring balance to people’s lives.

CEO, SMILINGMIND
They were a very responsive team! Extremely easy to communicate and work with!

Founder & CEO, TotTech
We’ve had very little-to-no hiccups at all—it’s been a really pleasurable experience.

Co-Founder, TEAM8s
Mindbowser was very helpful with explaining the development process and started quickly on the project.

Executive Director of Product Development, Innovation Lab
The greatest benefit we got from Mindbowser is the expertise. Their team has developed apps in all different industries with all types of social proofs.

Co-Founder, Vesica
Mindbowser is professional, efficient and thorough.

Consultant, XPRIZE
Very committed, they create beautiful apps and are very benevolent. They have brilliant Ideas.

Founder, S.T.A.R.S of Wellness
Mindbowser was great; they listened to us a lot and helped us hone in on the actual idea of the app. They had put together fantastic wireframes for us.

Co-Founder, Flat Earth
Ayush was responsive and paired me with the best team member possible, to complete my complex vision and project. Could not be happier.

Founder, Child Life On Call
The team from Mindbowser stayed on task, asked the right questions, and completed the required tasks in a timely fashion! Strong work team!

CEO, SDOH2Health LLC
Mindbowser was easy to work with and hit the ground running, immediately feeling like part of our team.

CEO, Stealth Startup
Mindbowser was an excellent partner in developing my fitness app. They were patient, attentive, & understood my business needs. The end product exceeded my expectations. Thrilled to share it globally.

Owner, Phalanx
Mindbowser's expertise in tech, process & mobile development made them our choice for our app. The team was dedicated to the process & delivered high-quality features on time. They also gave valuable industry advice. Highly recommend them for app development...

Co-Founder, Fox&Fork