BLOGS
BLOGS  NEWSROOM
  CASE STUDIES
  WEBINARS
  PODCASTS
  ASSET HUB
  EVENT CALENDAR


Introduction
In the ever-evolving landscape of web development, fostering seamless communication with users is the hallmark of a dynamic application. Enter Firebase, the game-changer that not only propels real-time engagement but does so with remarkable ease. Today, we embark on a journey through the realm of Firebase push notifications, unraveling the synergy between React, Python, and the robust Firebase Cloud Messaging (FCM) service.
Cloud Messaging API (Legacy)
Cloud Messaging API (Legacy) was an older version of Google’s messaging service. It was replaced by Firebase Cloud Messaging (FCM) for better features and integration.
Upgrading to Firebase Cloud Messaging
The transition from the old Cloud Messaging to Firebase Cloud Messaging (FCM) happened because people needed a better, more advanced messaging system. Firebase Push Notification (FCM) is like an upgraded version that comes with more features and works really well with other Firebase services.
It’s easier for developers to use, more reliable, and it fits into the larger Firebase family of tools. This change was made to keep up with the needs of today’s app development and to offer a complete and unified solution within Firebase.
➡️ Steps of Creating App in Firebase
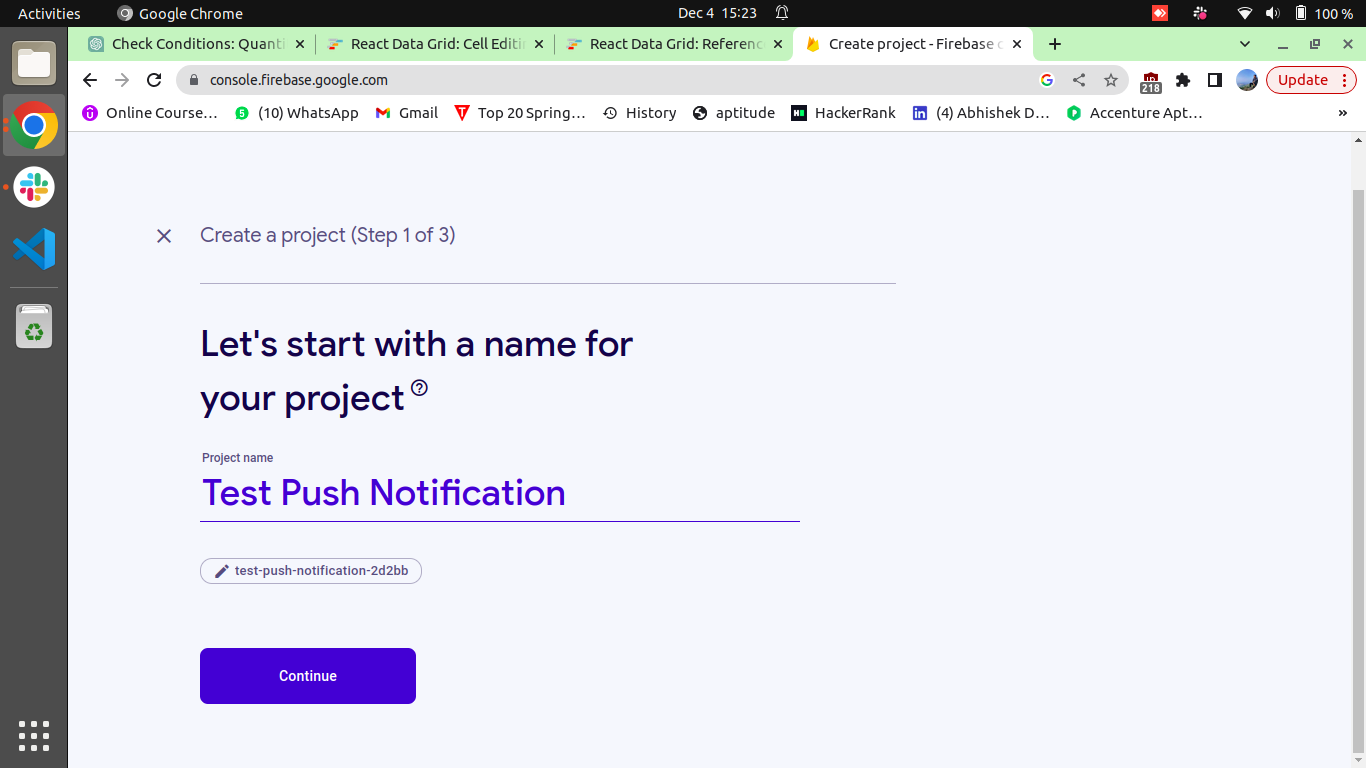
Create a Firebase Project:
🔸 Go to the Firebase Console.
🔸 Click on “Add Project” and follow the instructions to set up a new Firebase project.
Add Your App to the Project:
🔸 Once your project is created, click on “Add App” and select the platform (iOS, Android, or Web) for which you want to enable push notifications.

Configure Your App for FCM:
Follow the setup instructions provided by Firebase for your specific platform. This may involve adding a configuration file to your project or making changes in your app’s code.
Enable FCM in Your App:
Implement the necessary code to initialize FCM in your app. This usually includes obtaining a device token, which is used to uniquely identify the device.
Implement Token Handling:
Handle the registration token that your app receives from FCM. This token uniquely identifies the app instance on the device.
Send a Test Notification:
Try sending a practice notification to your app using the Firebase Console. This helps ensure that the FCM integration is working correctly.
Handle Received Notifications:
Implement the code to handle received Firebase Push Notifications in your app. This involves defining how your app should behave when a notification is received, opened, or dismissed.
Sharing a Few Screenshots for Better Understanding:-
Step 1: Set Up a React Project
Assuming you have Node.js and npm installed, you can create a new React project using Create React App:
npx create-react-app firebase-push-notifications
cd firebase-push-notifications
Step 2: Install Firebase
Install the Firebase npm package using:
npm install firebase
Step 3: Initialize Firebase
Create a Firebase project in the Firebase Console, and obtain your Firebase configuration object. Then, initialize Firebase in your React app by creating a file named firebase.js in the src folder:
// src/firebase.js
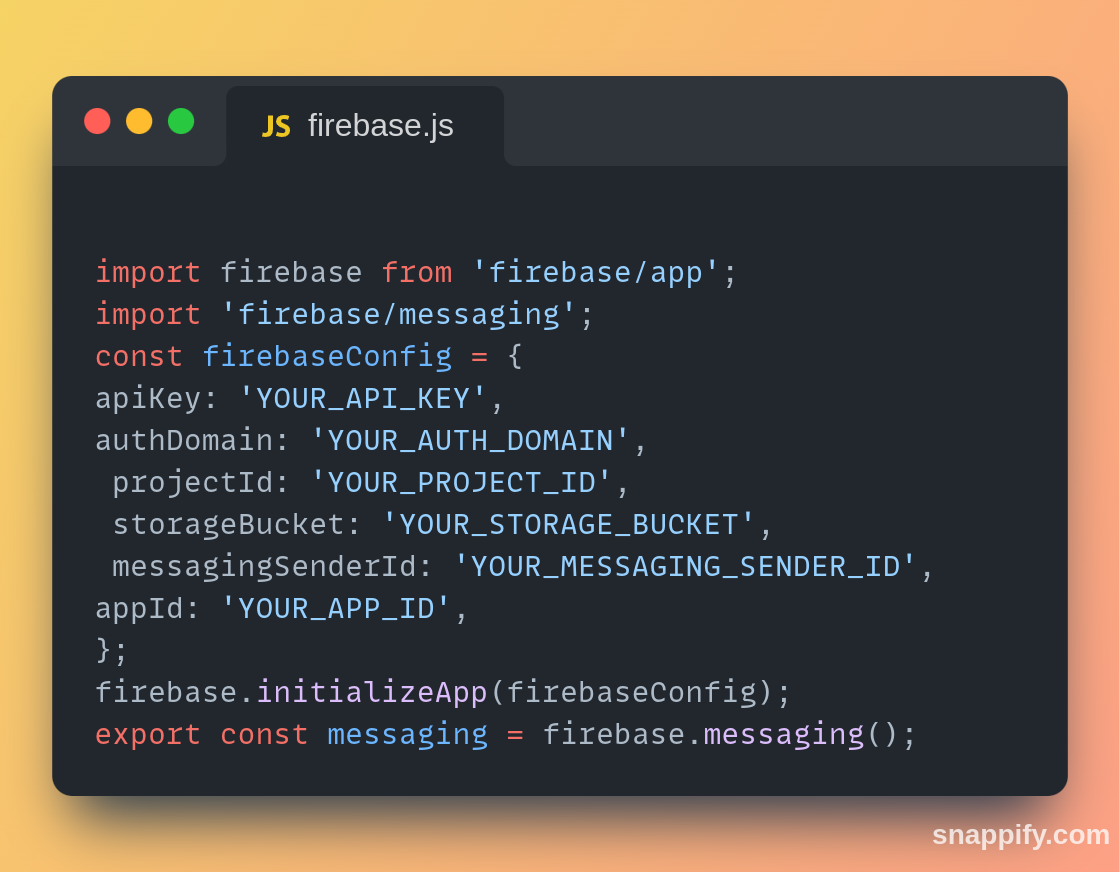
Replace ‘YOUR API KEY’, ‘YOUR AUTH DOMAIN’, with your actual Firebase configuration.
Navigate to Project Settings -> General, scroll down, and you will find the Config radio button.
Enhance Your App with Firebase Notifications! Hire Developers for a Superior User Experience
Step 4: Create Firebase-messaging-sw.js
Create a file named Firebase-messaging-sw.js in the public folder with the following content:
// public/Firebase-messaging-sw.js

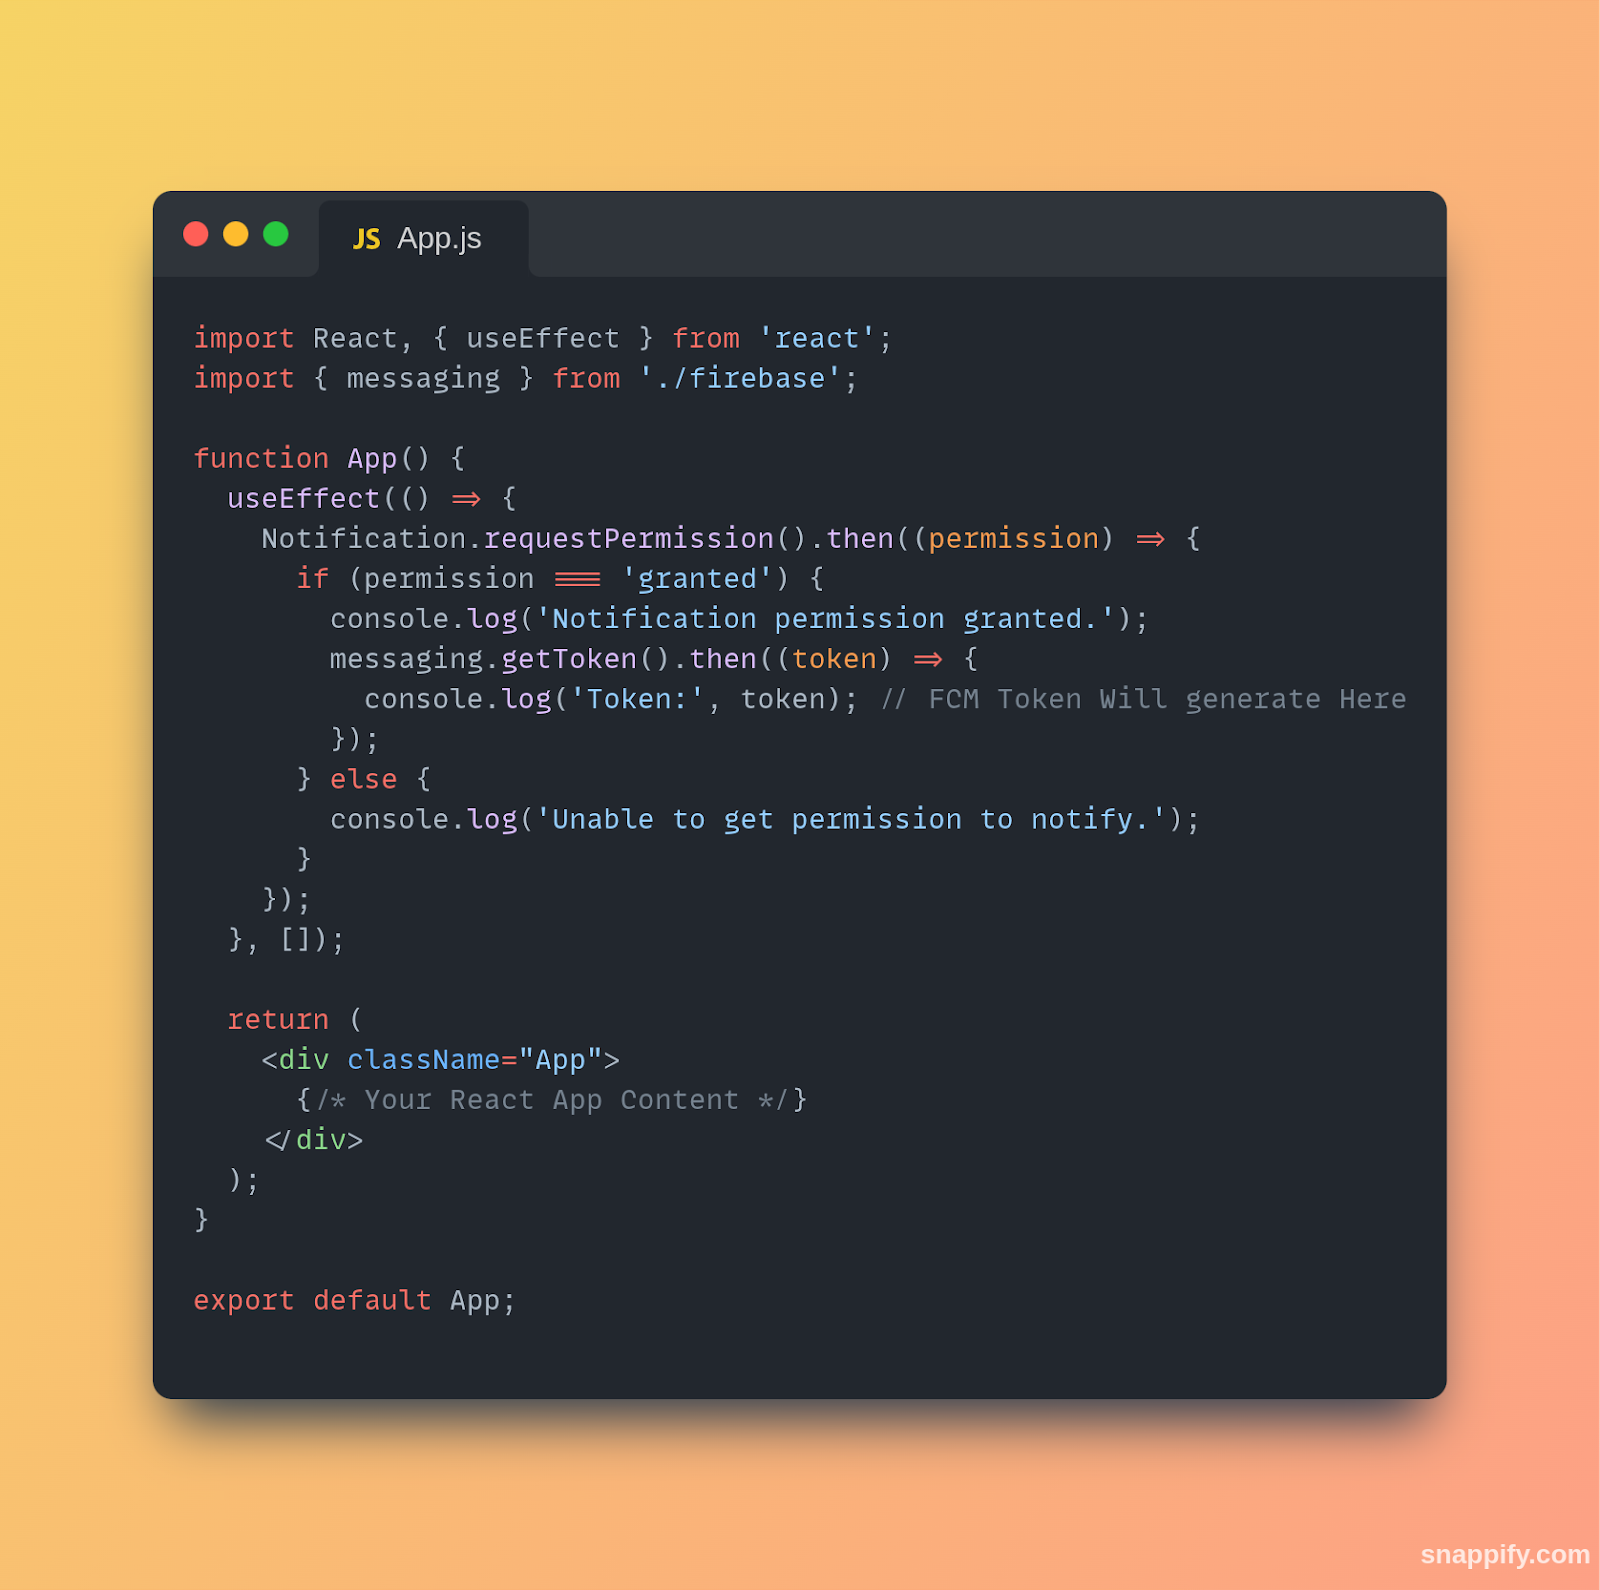
Step 5: User Permissions
In your React components, request permission from the user to receive notifications. Modify your App.js or any other component file as follows:
// src/App.js
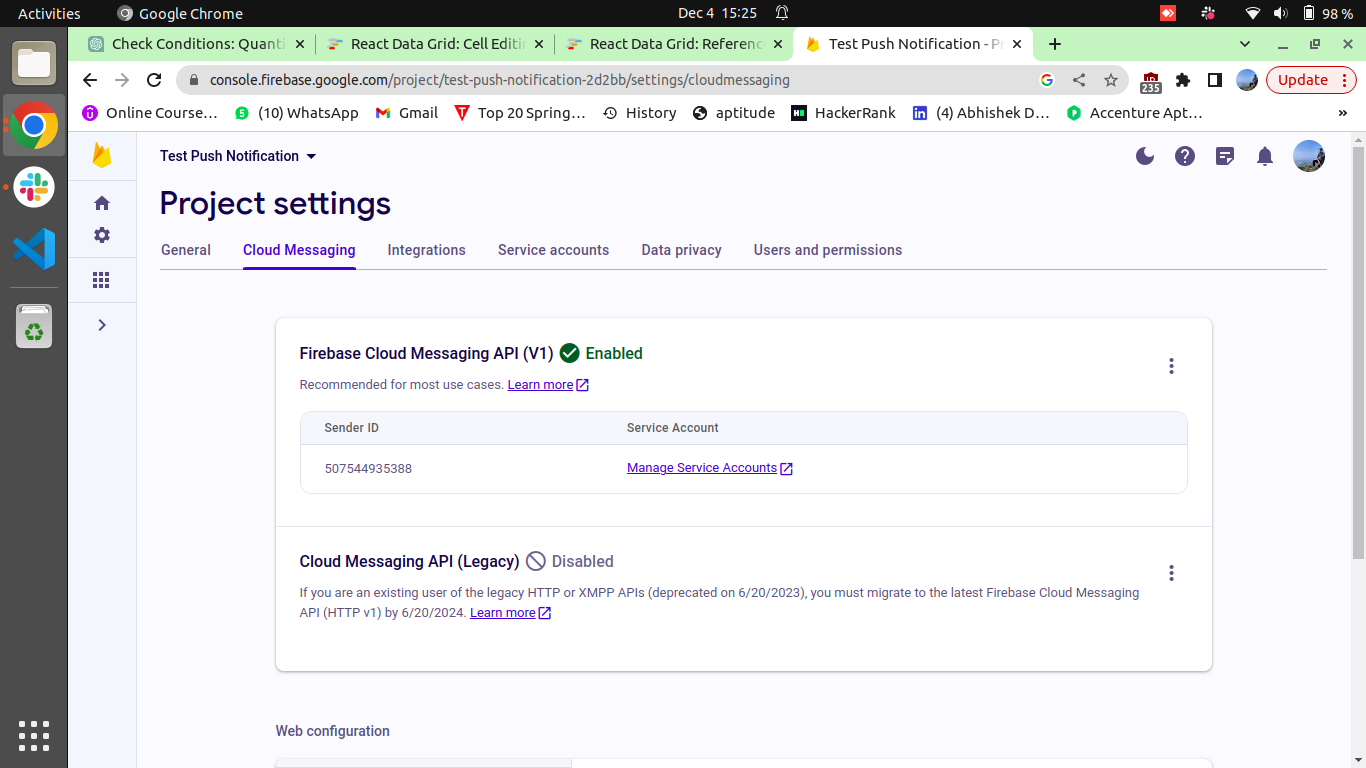
Step 6: Test Firebase Cloud Messaging
In the Firebase Console, go to “Cloud Messaging” and use the “Send Test Message” feature to test your notifications. Make sure your service worker (Firebase-messaging-sw.js) is registered successfully.
This is a basic setup for implementing Firebase Push Notifications in your app, and you might need to handle edge cases and customize notification behavior based on your app requirements. Ensure that you refer to the Firebase Cloud Messaging documentation for more detailed information.
After testing the notification, you can proceed to the next step, which involves connecting to the backend.
Related read: Firebase Push Notifications in React: A Complete Guide
For this Project Setting → Cloud Messaging →Click on Manage Service Account →

Click Here →Keys→Add keys
Then your json file will be downloaded.
Send Push Notification Through Python Django Backend
Following are the steps need to follow to send push notifications through Django Rest API:
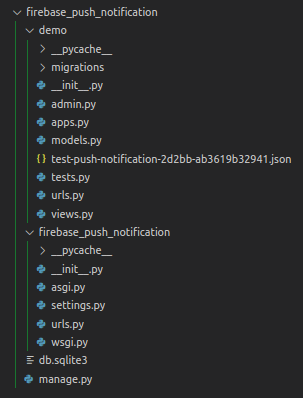
Step 1: Create a Django Project and Django App.
Step 2: Add json file in your Django app which is downloaded from the Firebase dashboard.
Related read: Integrating Django Backend with React Frontend: A Step-by-Step Tutorial
Step 3: Install the google-auth Python library.
pip install google-auth.
Now you can use the following API to send notifications:
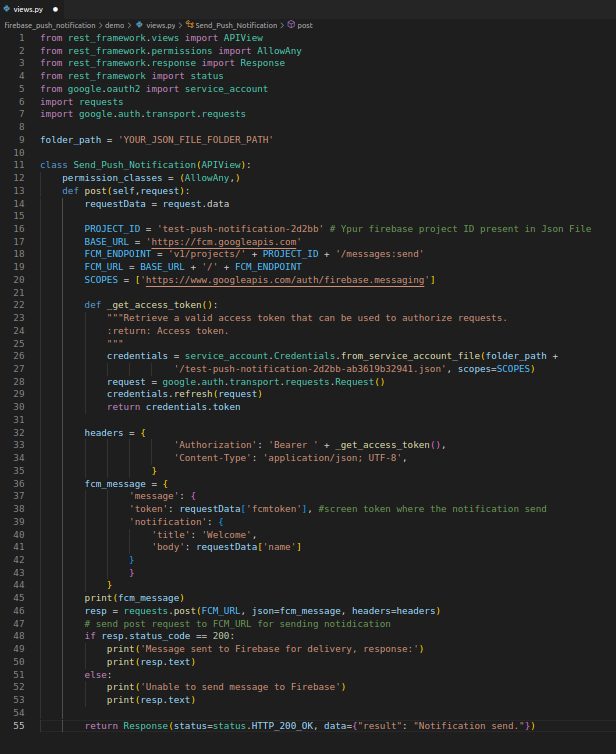
Now you can successfully send push notifications.
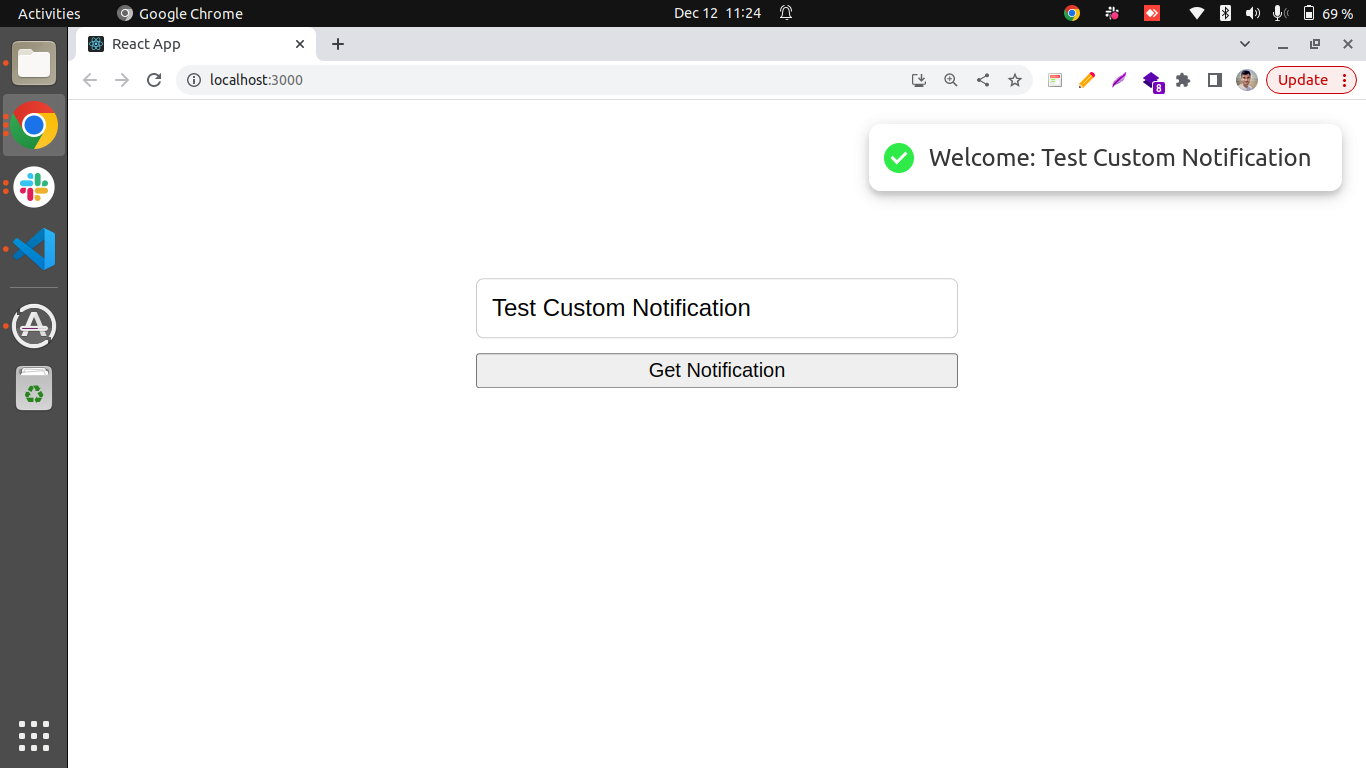
Screen Shot for Reference

Acknowledgment
Special thanks to Krishna Attal’s for his invaluable contribution to the Python section of this blog. Your expertise and support have made a significant impact, elevating the quality of our content. Grateful for your contributions!
Conclusion
In conclusion, this blog has explored the integration of Firebase push notifications with React.js and Python, emphasizing the significance of real-time engagement. The transition from the legacy Cloud Messaging API to Firebase Cloud Messaging (V1) underscores the platform’s evolution for improved features and seamless integration.
The tutorial provides developers with a clear roadmap, leveraging React.js and Python. Overall, the blog serves as a concise guide for mastering Firebase push notifications and enhancing user communication in applications.