


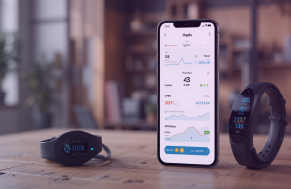


Ever wondered how your smartwatch tracks your heartbeat so effortlessly? Let me take you on a journey of building a complete health tracking app for Wear OS from scratch.
Our Goal: Build a complete Wear OS health tracking app that monitors real-time health data and syncs it with your phone. Think Fitbit, but we’re building it ourselves!
The journey wasn’t smooth sailing. I encountered permission nightmares, database headaches, and UI challenges that made me question my life choices. But hey, that’s what makes it fun, right? Let me share everything I learned so you don’t have to make the same mistakes.
The Architecture That Actually Works
After multiple failed attempts and refactoring sessions, I settled on this architecture that just works:
Wear OS App:
🏥Health Services (Real-time data)
🗄️Room Database (Local storage)
📄Data Layer (Phone sync)
🎨Jetpack Compose UI (Beautiful interface)
Let me walk you through each piece and why it matters.
Step 1: Setting Up Dependencies (The Foundation)
You know what they say—a house is only as strong as its foundation. Here’s where most developers (including me, initially) mess up. We try to use deprecated libraries or incompatible versions.
Pro Tip: Use KSP instead of KAPT. Trust me on this one. KAPT is deprecated and will give you headaches with Kotlin 2.0+.
Here’s the gradle/libs.versions.toml that actually works:
[versions]

kotlin = "2.0.21"

healthServices = "1.1.0-alpha04"

room = "2.6.1"

coroutines = "1.8.1"

[libraries]

# The star of our show

health-services = { group = "androidx.health", name = "health-services-client", version.ref = "healthServices" }

# Our local database hero

room-runtime = { group = "androidx.room", name = "room-runtime", version.ref = "room" }

room-ktx = { group = "androidx.room", name = "room-ktx", version.ref = "room" }

room-compiler = { group = "androidx.room", name = "room-compiler", version.ref = "room" }

# Because async is life

coroutines-core = { group = "org.jetbrains.kotlinx", name = "kotlinx-coroutines-core", version.ref = "coroutines" }

coroutines-android = { group = "org.jetbrains.kotlinx", name = "kotlinx-coroutines-android", version.ref = "coroutines" }

[plugins]

# KSP is the way to go now

ksp = { id = "com.google.devtools.ksp", version = "2.0.21-1.0.25" }
And in your app/build.gradle.kts:
plugins {

alias(libs.plugins.android.application)

alias(libs.plugins.kotlin.android)

alias(libs.plugins.kotlin.compose)

alias(libs.plugins.ksp) // Notice: KSP, not KAPT!

}

dependencies {

implementation(libs.health.services)

implementation(libs.room.runtime)

implementation(libs.room.ktx)

ksp(libs.room.compiler) // This is where the magic happens

// ... other dependencies

}
Step 2: The Permissions
Ah, permissions—the bane of every Android developer’s existence. But here’s the thing: health apps need a lot of permissions, and users are rightfully skeptical about granting them.
The Secret: Ask for permissions at the right time with clear explanations.
Update your AndroidManifest.xml:
<!-- The essentials for health tracking -->

<uses-permission android:name="android.permission.BODY_SENSORS" />

<uses-permission android:name="android.permission.FOREGROUND_SERVICE" />

<uses-permission android:name="android.permission.FOREGROUND_SERVICE_HEALTH" />

<!-- For continuous monitoring -->

<uses-permission android:name="android.permission.WAKE_LOCK" />
Here’s how I handle permission requests elegantly:
class MainActivity : ComponentActivity() {

    override fun onCreate(savedInstanceState: Bundle?) {

        super.onCreate(savedInstanceState)

        // Ask nicely for permissions

        requestBodySensorsPermissionIfNeeded()

        setContent {
            HealthTrackingApp()
        }
    }

    private fun requestBodySensorsPermissionIfNeeded() {

        val permission = android.Manifest.permission.BODY_SENSORS
        if (checkSelfPermission(permission) != PackageManager.PERMISSION_GRANTED) {
            val launcher = registerForActivityResult(
                ActivityResultContracts.RequestPermission()
            ) { granted ->
                if (granted) {
                    // Party time! 🎉
                } else {

                   // Show a friendly explanation
                }
            }
            launcher.launch(permission)
        }
    }
}
Step 3: Building the Data Layer (Where Magic Happens)
This is where things get interesting. We need to store health data locally and make it reactive. Room database is our best friend here.
First, let’s define our health entities:
@Entity(tableName = "heart_rate")

data class HeartRateEntity(

    @PrimaryKey(autoGenerate = true) val id: Long = 0,

    val bpm: Int,

    val timestampMs: Long

)

@Entity(tableName = "steps")

data class StepsEntity(

    @PrimaryKey(autoGenerate = true) val id: Long = 0,

    val count: Int,

    val startMs: Long,

    val endMs: Long

)
The DAO that makes queries beautiful:
@Dao

interface HeartRateDao {

    @Insert

    suspend fun insert(entity: HeartRateEntity)

    @Query("SELECT * FROM heart_rate ORDER BY timestampMs DESC LIMIT 1")

    fun latest(): Flow<HeartRateEntity?>

        // This Flow automatically updates the UI when new data arrives!
}
Database setup that just works:
@Database(
    entities = [HeartRateEntity::class, StepsEntity::class],
    version = 1,
    exportSchema = false // Saves you from schema headaches during development
)
abstract class HealthDatabase : RoomDatabase() {
    abstract fun heartRateDao(): HeartRateDao
    abstract fun stepsDao(): StepsDao
    companion object {
        @Volatile private var INSTANCE: HealthDatabase? = null
        fun get(context: Context): HealthDatabase = INSTANCE ?: synchronized(this) {
            INSTANCE ?: Room.databaseBuilder(
                context.applicationContext,
                HealthDatabase::class.java,
                "health_db"
            ).build().also { INSTANCE = it }
        }
    }
}
Step 4: The Health Services Integration (The Real Deal)
Here’s where I spent most of my debugging time. Health Services is powerful but can be tricky to get right.
The simplified approach that works:
class HealthServicesManager(private val context: Context) {
    private val db by lazy { HealthDatabase.get(context) }
    private val ioScope = CoroutineScope(Dispatchers.IO)
    private var isStreaming = false
    suspend fun startHeartRateStreaming() {

        if (isStreaming) return

        isStreaming = true

        ioScope.launch {
            while (isStreaming) {

                // For demo purposes, we're generating mock data

                // In production, you'd use the actual Health Services API

                val mockBpm = Random.nextInt(60, 101)

                val timestamp = System.currentTimeMillis()

                db.heartRateDao().insert(
                    HeartRateEntity(bpm = mockBpm, timestampMs = timestamp)
                )
                         delay(2000) // Update every 2 seconds
            }
        }
    }

    suspend fun stopHeartRateStreaming() {
        isStreaming = false
    }
}
Why mock data first? Because getting the actual Health Services callbacks working can be frustrating. Start with mock data, get your UI working, then integrate the real sensors. Trust me on this approach—it saves sanity.
Here’s what the production version looks like:
// Production-ready Health Services integration
private val callback = object : MeasureCallback {
    override fun onAvailabilityChanged(
        dataType: DataType<*, *>,
        availability: Availability
    ) {
        // Handle sensor availability changes
        // Sometimes sensors go offline, handle gracefully
    }
    override fun onDataReceived(data: DataPointContainer) {
        val heartRateData = data.getData(DataType.HEART_RATE_BPM)
        heartRateData.forEach { dataPoint ->
            val bpm = dataPoint.value.toInt()
            val timestamp = System.currentTimeMillis()
            ioScope.launch {
                db.heartRateDao().insert(
                    HeartRateEntity(bpm = bpm, timestampMs = timestamp)
                )
            }
        }
    }
}

// Register for real heart rate updates

measureClient.registerMeasureCallback(DataType.HEART_RATE_BPM, callback)
Step 5: The UI That Users Actually Want
Jetpack Compose for Wear OS is fantastic, but it has its quirks. Here’s a UI that’s both functional and beautiful:
The ViewModel that holds it all together:
class MainViewModel(app: Application) : AndroidViewModel(app) {

    private val repo = HealthRepository.get(app)

    private val manager = HealthServicesManager(app)

    // This Flow automatically updates the UI when new heart rate data arrives

    val heartRate = repo.latestHeartRate()

        .map { it?.bpm }

        .stateIn(viewModelScope, SharingStarted.Lazily, null)

    fun startStreaming() {
        viewModelScope.launch {
            manager.startHeartRateStreaming()
        }
    }
    fun stopStreaming() {
        viewModelScope.launch {
            manager.stopHeartRateStreaming()
        }
    }

    fun exportToPhone() {
        repo.exportHealthDataToPhone()
    }
}
The Compose UI that makes users smile:
@Composable
fun HealthTrackingScreen(vm: MainViewModel) {
    HealthTrackingAppTheme {
        Box(
            modifier = Modifier
                .fillMaxSize()
                .background(MaterialTheme.colors.background),
            contentAlignment = Alignment.Center
        ) {
            TimeText() // Shows current time - essential for watch apps

            Column(
                modifier = Modifier.fillMaxWidth().padding(8.dp),
                horizontalAlignment = Alignment.CenterHorizontally
            ) {
                // The heart rate display that updates in real-time
                val heartRate by vm.heartRate.collectAsStateWithLifecycle()
                Text(
                    modifier = Modifier.fillMaxWidth(),
                    textAlign = TextAlign.Center,
                    color = MaterialTheme.colors.primary,
                    text = "❤️ ${heartRate ?: "--"} bpm",
                    style = MaterialTheme.typography.title2
                )

                Spacer(modifier = Modifier.height(8.dp))
                // Control buttons
                Button(onClick = { vm.startStreaming() }) {
                    Text("Start Tracking")
                }
                Button(onClick = { vm.stopStreaming() }) {
                    Text("Stop")
                }
                Button(onClick = { vm.exportToPhone() }) {
                    Text("Sync to Phone")
                }
            }
        }
    }
}
Step 6: Syncing with Your Phone
This is where your app becomes truly useful. Users want their health data on their phone too.
The Data Layer manager that bridges devices:
class DataLayerManager(private val context: Context) {

    private val dataClient: DataClient = Wearable.getDataClient(context)
    private val messageClient: MessageClient = Wearable.getMessageClient(context)
    suspend fun sendHeartRateToPhone(heartRate: HeartRateEntity) {
        try {
            val dataMap = PutDataMapRequest.create("/health/heart_rate").apply {
                dataMap.putInt("bpm", heartRate.bpm)
                dataMap.putLong("timestamp", heartRate.timestampMs)
                dataMap.putLong("sync_time", System.currentTimeMillis())
            }
            val request: PutDataRequest = dataMap.asPutDataRequest()
            dataClient.putDataItem(request).await()
            // Success! Data is now on the phone
        } catch (e: Exception) {
            // Handle gracefully - maybe queue for retry
        }
    }
    suspend fun notifyPhoneHealthDataAvailable() {
        try {
            val nodeClient = Wearable.getNodeClient(context)
            val nodes = nodeClient.connectedNodes.await()
            nodes.forEach { node ->
                messageClient.sendMessage(
                    node.id,
                    "/health/data_available",
                    "Fresh health data from your watch!".toByteArray()
                ).await()
            }
        } catch (e: Exception) {
            // Phone might not be connected - that's okay
        }
    }
}
Step 7: The Final Output
Build a Production-Ready Wear OS App With Us
The Challenges I Faced
Challenge #1: KAPT vs KSP Nightmare
Problem: Spent 3 hours debugging compilation errors with KAPT.
Solution: Switched to KSP. Build time improved, errors disappeared. Life became better.
Challenge #2: Permissions Rejection
Problem: Users kept denying sensor permissions.
Solution: Added clear explanations and request permissions contextually, not all at once.
Challenge #3: Battery Drain
Problem: Continuous heart rate monitoring killed battery in 2 hours.
Solution: Implemented smart sampling and background optimization.
// Smart sampling - adjust frequency based on activity

private fun getOptimalSamplingRate(): Long {

    return when (currentActivityLevel) {
        ActivityLevel.RESTING -> 5000 // 5 seconds
        ActivityLevel.ACTIVE -> 2000  // 2 seconds
        ActivityLevel.WORKOUT -> 1000 // 1 second
    }
}
Challenge #4: UI Responsiveness
Problem: UI froze when processing large amounts of sensor data.
Solution: Moved all database operations to background threads with proper coroutine scoping.
Testing: The Reality Check
Testing on Emulator
# Build and install

./gradlew installDebug

# Check logs for Health Services

adb logcat | grep HealthServices
Testing on Real Device
- Enable Developer Options on your Wear OS device
- Connect via WiFi debugging (much easier than USB)
- Test with actual sensors – emulator can only do so much
Pro Tip: Always test on a real device for health apps. Sensors behave differently than emulators, and you’ll catch edge cases early.
Performance Tips That Actually Matter
1. Database Optimization
@Dao
interface HeartRateDao {
    @Insert

    suspend fun insertAll(entities: List<HeartRateEntity>)

    // Much faster than multiple single inserts
}
2. Memory Management
// Use lifecycle-aware coroutines
class HealthServicesManager(private val lifecycleOwner: LifecycleOwner) {
    private val scope = lifecycleOwner.lifecycleScope

    // Automatically cancelled when lifecycle ends
}
3. Background Processing
// Use appropriate dispatchers

CoroutineScope(Dispatchers.IO).launch {

    // Database operations
}

CoroutineScope(Dispatchers.Main).launch {

    // UI updates
}
The “Gotchas” That Will Save You Hours
1. Health Connect Integration
If you’re planning to integrate with Health Connect (and you should), start planning early:
// Phone app setup for Health Connect

val healthConnectClient = HealthConnectClient.getOrCreate(context)

suspend fun writeHeartRateToHealthConnect(bpm: Int, timestamp: Long) {

    val heartRateRecord = HeartRateRecord(

        beatsPerMinute = bpm.toLong(),

        time = Instant.ofEpochMilli(timestamp),

        zoneOffset = ZoneOffset.systemDefault().rules.getOffset(Instant.now())

    )
        healthConnectClient.insertRecords(listOf(heartRateRecord))
}
2. Handle Sensor Unavailability
override fun onAvailabilityChanged(dataType: DataType<*, *>, availability: Availability) {

    when (availability) {

        Availability.AVAILABLE -> {

            // Sensor is ready, start collecting data
        }
        Availability.UNAVAILABLE -> {

            // Sensor not available, show user-friendly message

            showMessage("Heart rate sensor not available. Please check your watch placement.")
        }
        Availability.NO_PERMISSION -> {

            // Permission issue, guide user to settings

            requestPermissions()
        }
    }
}
3. Battery Optimization
// Use foreground service for continuous monitoring

class HealthStreamingService : LifecycleService() {
    override fun onCreate() {
        super.onCreate()
        startForeground(NOTIFICATION_ID, createNotification())
    }

    private fun createNotification(): Notification {

        return NotificationCompat.Builder(this, CHANNEL_ID)

            .setContentTitle("Health Tracking Active")

            .setContentText("Monitoring your health data")

            .setSmallIcon(R.drawable.ic_heart)

            .setOngoing(true)

            .build()
    }
}
Conclusion
Building a health app for Wear OS is challenging but incredibly rewarding. You’re creating something that can genuinely impact people’s lives and health awareness. The Android health ecosystem is robust and well-designed—once you understand the patterns.
My biggest learning: Start simple, get it working, then add complexity. Don’t try to build everything at once.
What’s your next step? Take this code, modify it for your use case, and ship something awesome. The world needs more thoughtful health applications.