


Introduction
Angular components serve as the fundamental building blocks of Angular applications, enabling developers to encapsulate functionality and markup for reuse throughout the application. They play a crucial role in achieving scalability and maintainability in Angular development. Creating Reusable Angular Components is a fundamental practice for building robust applications. The NgTemplateOutlet directive emerges as a powerful tool, empowering developers to efficiently create Reusable Angular Components that offer flexibility and ease of use.
This blog will teach you how to use the NgTemplateOutlet directive to create Reusable Angular Components. We will start with a basic example and then move on to more advanced topics, such as passing context data to templates and using transclusion to create reusable components for complex user interfaces.
By the end of this blog post, you will be able to confidently use the ng-template and NgTemplateOutlet directive to create Reusable Angular Components for all sorts of purposes.
Let’s Get Started
While examining the DOM, I noticed Angular applying the ng-content directive to elements. This raised a question: If these elements already exist in the final DOM, what purpose does <ng-container> serve? This confusion led me to explore the differences between <ng-container> and <ng-content>.
Let’s delve into each of these concepts without further ado.
Let’s Start with ng-template: What Exactly is it ??
The <ng-template> element, as its name implies, is a template that Angular employs in conjunction with structural directives like *ngIf, *ngFor, [ngSwitch], and custom directives.
These template elements function solely in conjunction with structural directives. Angular encapsulates the host element (to which the directive is applied) within <ng-template> and then removes the <ng-template> from the final DOM, replacing it with diagnostic comments.
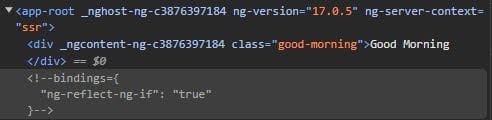
Here is a simple example of *ngIf:
<div *ngIf="isVisible" class="good-morning">Good Morning</div>

<!-- Converted element -->
<ng-template [ngIf]=isVisible>
<div class="good-morning">Good Morning</div>
</ng-template>
Code: Angular’s Mechanism for Evaluating Structural Directives
Angular’s mechanism for evaluating structural directivesIn the case of *ngIf, Angular encloses the host element to which the directive is applied within an <ng-template> element while retaining the host element itself. The resulting final DOM structure resembles the one we encountered earlier in this article:
Related read: React Virtual Dom vs Real Dom
Usage
To utilize <ng-template>, we can employ it alongside a structural directive, as shown below:
<ng-template *ngIf="hellWorld">Hello World</ng-template>The helloWorld property is a boolean value set to true. The resulting DOM output is:

No content is displayed.
Why is our message not being displayed?
This was expected. Angular replaces <ng-template> with comments.
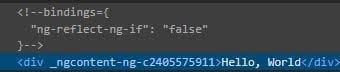
Let’s Compare the Two DOMs Created by Angular:

Example 1
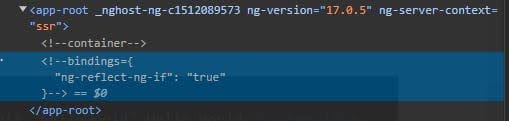
Example 2
In Example 2’s final DOM, there’s an extra comment tag. Angular interpreted the code as:
<ng-template *ngIf="hellWorld">Hello World</ng-template>

<!-- Converted element -->
<ng-template [ngIf]="helloWorld">
<ng-template>Hello World</ng-template>
</ng-template>
Angular nested your <ng-template> inside another <ng-template> and converted both of them into diagnostic comments, hiding your message.
Two Methods Can be Used to Achieve the Desired Result:
<!-- Method 1 -->
<ng-template [ngIf]="hellWorld">Hello World</ng-template>
<!-- Method 2 -->
<ng-template *ngIf="hellWorld then hello"></ng-template>
<ng-template #hello>Hello World</ng-template>
Method 1: This method provides Angular with the de-sugared format, eliminating the need for further processing. Angular converts <ng-template> to comments but preserves the content inside, allowing it to render correctly.
Method 2: Using multiple <ng-template> tags is not recommended as it’s not their intended purpose. These tags act as containers for reusable templates. We’ll explore this next section.
What is ngTemplateOutlet?
ngTemplateOutlet is an Angular directive that enables dynamic template rendering within a component.
How to Use ngTemplateOutlet
Before using ngTemplateOutlet, define the template to render.
Let’s define the template within the component’s template:
<ng-container *ngTemplateOutlet="myTemplate"></ng-container>

<ng-template #myTemplate>
<p>Good Morning</p>
</ng-template>
This example uses the ng-container element to host the ngTemplateOutlet directive. It defines a template with the #myTemplate variable, which includes a paragraph displaying “Good Morning!”. The ngTemplateOutlet directive renders the myTemplate template within the ng-container element.
To dynamically load the template from a separate file, use ngTemplateOutletContext to specify the template and its context.
<ng-container *ngTemplateOutlet="templateRef; context: data"></ng-container>This example uses templateRef to specify the template for rendering and context to define the rendering context.
Next-Level Apps: Hire Skilled Angular Developers!
Customizing with ngTemplateOutlet
One of the key benefits of using ngTemplateOutlet is that it enables flexible content rendering, making components more reusable.
In the context of a component displaying a list of items, ngTemplateOutlet empowers developers to customize the rendering of each item. An illustrative example is provided below:
<ng-container *ngFor="let item of items">
<ng-container *ngTemplateOutlet="itemTemplate; context: { $implicit: item }"></ng-container>
</ng-container>

<ng-template #itemTemplate let-item>
<div>{{ item?.name }}</div>
</ng-template>
In this instance, the ngTemplateOutlet directive is employed in conjunction with a ngFor loop to render a list of items. Additionally, a template with the #itemTemplate variable is defined. This template encompasses a div element responsible for displaying the item’s name.
To enable the customization of item rendering, developers can inject their templates using the ngTemplateOutlet directive. The context input serves as a conduit for item data to be passed into the template, empowering developers to tailor the rendering of each list item.
This approach proves particularly valuable in the creation of Reusable Angular Components that can be adapted to the specific requirements of diverse projects. Leveraging ngTemplateOutlet enables the development of components that provide foundational functionality while simultaneously granting developers the flexibility to customize the rendering of the component’s content.
Leveraging ngTemplateOutlet for Enhanced Component Customization
Beyond the fundamental applications of ngTemplateOutlet, there exist sophisticated techniques that enhance the customization of component rendering.
One such technique involves utilizing the ngTemplateOutletContext input to inject supplementary data into the template. For instance, the context input can be used to introduce a function that modifies the data before its rendering. Here’s an example:
<ng-container *ngTemplateOutlet="itemTemplate; context: { $implicit: item, formatDate: formatDate }"></ng-container>

<ng-template #itemTemplate let-item let-formatDate="formatDate">
<div>{{ formatDate(item?.date) }}</div>
</ng-template>
This example demonstrates the utilization of the context input to inject a function named formatDate, which facilitates the modification of an item’s date before rendering. The formatDate function is introduced as an input to the template, empowering developers to tailor the content rendering based on the provided data.
Another sophisticated technique employable with ngTemplateOutlet involves crafting a template that incorporates multiple ngTemplateOutlet directives. This approach proves particularly valuable when constructing intricate templates that demand distinct sections to be tailored. Here’s an example:
<ng-container *ngTemplateOutlet="itemTemplate; context: { $implicit: item }"></ng-container>

<ng-template #itemTemplate let-item>
<div class="item-header">
<ng-container *ngTemplateOutlet="nameTemplate"></ng-container>
</div>
<div class="item-body">
<ng-container *ngTemplateOutlet="descriptionTemplate"></ng-container>
</div>
<div class="item-footer">
<ng-container *ngTemplateOutlet="actionTemplate"></ng-container>
</div>
</ng-template>

<ng-template #nameTemplate>
<h2>{{ item?.name }}</h2>
</ng-template>

<ng-template #descriptionTemplate>
<p>{{ item?.description }}</p>
</ng-template>

<ng-template #actionTemplate>
<button>Edit</button>
<button>Delete</button>
</ng-template>
Leveraging the itemTemplate, this example illustrates the creation of an elaborate template encompassing multiple distinct sections. The nameTemplate, descriptionTemplate and actionTemplate facilitate the customization of each section within the template, enabling developers to craft a highly personalized rendition of the content.
Related read: How To Implement Angular Elements

Conclusion
In this blog post, we have explored the NgTemplateOutlet directive and its power to create Reusable Angular Components. We have seen how this directive allows us to dynamically insert templates into the DOM, providing a flexible and powerful mechanism for customizing the rendering of component content.
With NgTemplateOutlet, we can effectively encapsulate reusable UI fragments, enabling efficient code reuse and simplified component development. Moreover, the directive’s ability to handle dynamic content and data binding makes it a versatile tool for building complex and interactive applications.