BLOGS
BLOGS  NEWSROOM
  CASE STUDIES
  WEBINARS
  PODCASTS
  ASSET HUB
  EVENT CALENDAR


In this article, I’ll be sharing my insights on how to successfully retrieve data from the API in the storybook for Angular.
What is a Storybook?
Storybook integrates with javascript UI frameworks and supports server-rendered component frameworks such as Ruby on Rails. Storybook is a library that helps us to create all our components in isolation. To manage the component in large projects so it’s easy to manage the component in isolation by using a storybook. Storybook also creates documentation about components. It also renders the component in various dimensions and orientations to check its responsiveness.
Addons are the plugins that extend the storybook core functionality. It is useful especially when you want quick changes in the component instead of refreshing the whole project with each change. Storybook can also create a static storybook site.
We can also do routing in a storybook by godchildren. In the storybook rendering of components styles as it renders whatever DOM elements you provide.
Let’s quickly go over setting up Storybook for Angular as well as basic usage.
Setting up Storybook for Angular
Storybook comes with the CLI command that makes it easy to add to our project. Firstly we need to install the CLI package globally. Run this in your existing project root directory:
# Add Storybook:
npx storybook init
You can now try it out by invoking the storybook npm script:
# Run Storybook:
$ npm run storybook
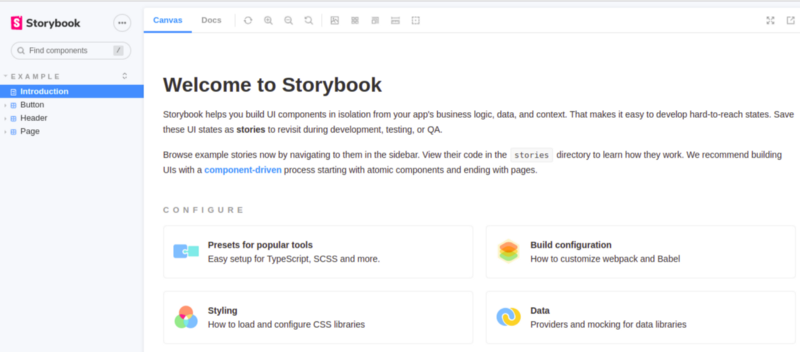
This will start a local web pack server on port 6006. What you’ll see is a Storybook example that was generated from Button.stories.ts, and Page.stories.ts files under a stories folder at the root of the project. Here’s what the generated Storybook looks like:
Integration of Storybook with API
Let’s now create a simple component and a story for it with the integration of API.
➡️ Here’s Our Component’s Template
// <component_name>.component.html File :

<div class="movies">
// This is a Custom Component
<app-nav-bar></app-nav-bar>

<div class="trending-movies">
<h5 class="trending-text">Upcoming movies</h5>
</div>
// This is a Custom Component
<app-card-carousel></app-card-carousel>

<div class="trending-movies">
<h5 class="trending-text">Trending movies</h5>
</div>
<div class="container">
<div class="row">
<div class="col col-md-4 col-sm-4 p-4" *ngFor="let movie of movieData">
// This is a simple component
// This is where our API data is going to display
<app-card-view [movieDetail]="movie"></app-card-view>
</div>
</div>
</div>
</div>
➡️ Here’s Our Component’s Class
//<component_name>.component.ts File :

import { Component, OnInit , OnDestroy} from '@angular/core';
import { Subscription } from 'rxjs';
import { ApiService } from 'src/app/shared/service/api.service';

@Component({
selector: 'app-movies',
templateUrl: './movies.component.html',
styleUrls: ['./movies.component.scss']
})
export class MoviesComponent implements OnInit , OnDestroy{

allMovies: any = [];
movieData: any = [];

getSubscription !: Subscription;

constructor(
private movieApiService : ApiService
) { }

ngOnInit(): void {

this.getSubscription = this.movieApiService.getMovie().subscribe(
(res:any) => {
this.allMovies = res.data;
this.getFilteredData(this.allMovies);
},
(err:any) => {
console.error(err);
}
);
}

ngOnDestroy(): void {
this.getSubscription.unsubscribe();
}

getFilteredData(data:any) {
data.filter((datamovie: any)=>{
if(datamovie.type === 'movie'){
this.movieData.push(datamovie);
}
})
}

}
➡️ Here are Our Stories’ Class
- In the Stories.ts file, we need to import our component along with it we also need to import our service file and HttpClientModule as well.
- We can also add the routing in the storybook for that we need to import the router module.
- In the Module metadata of the imports section we need to import the RouterModule.forRoot([]) for routing.
- In the Module metadata of declarations, the section needs to pass our component which is imported.
- In the Module metadata of providers, the section needs to pass our imported service file.
//<component_name>.stories.ts File :

import { Story, Meta } from '@storybook/angular/types-6-0';
import { MoviesComponent } from './movies.component';
import { HttpClientModule } from '@angular/common/http';
import { ApiService } from 'src/app/shared/service/api.service';
import { moduleMetadata, storiesOf } from '@storybook/angular';
import { ElementsModule } from 'src/app/elements/elements.module';
import { FeatureRoutingModule } from '../feature-routing.module';
import { RouterModule } from '@angular/router';
import { withA11y } from '@storybook/addon-a11y';

// @ts-ignore
import markNotes from './../movies/moviesreadme.md';

storiesOf('Movies Component', module)
// .addDecorator(withA11y)
.addDecorator(
moduleMetadata({
imports : [HttpClientModule,
ElementsModule,
FeatureRoutingModule,
RouterModule.forRoot([])],
declarations : [MoviesComponent],
providers : [ApiService]
}),
)
.add('Default', () => {
return {
template : `<app-movies></app-movies>`,
props : {

}
}

},{
notes : {markdownNotes : markNotes}
});
Here are a few things to note:
- As you can see, stories are created by chaining calls to add() on a call to storyOf().
- add() takes a name for the story and a function that returns an object with the component and props (inputs and outputs).
- Actions triggered by outputs can be logged using the action addon.
- Notes can be added to a story using the notes addon.
See this page for a list of other add-ons that can be used with Storybook.
Building a Storybook for Deployment
It’s easy to generate a Storybook with static files that can be deployed to a static hosting service like GitHub pages. This allows for hosting a Storybook that other team members can easily consult.
Simply invoke the build-storybook npm script:
$ npm run build-storybook
It’ll generate a storybook-static folder at the project’s root with all the files ready to be uploaded to your static hosting service of choice. You can also try it out locally using npx and HTTP-server:
$ cd storybook-static
$ npx http-server

Conclusion
Integrating APIs in Storybook for Angular has proved to be a seamless process, from concept to reality. The setup process was straightforward, laying a solid foundation for UI components. The integration of Storybook with APIs facilitated efficient testing and collaboration between frontend and backend teams.
Building a Storybook for deployment ensured easy accessibility and sharing of components, enabling effective feedback and iteration.
Overall, the integration of APIs in Storybook for Angular has transformed UI development, streamlining workflows and delivering high-quality components. Experience the ease and efficiency of Storybook in API integration for your Angular projects.