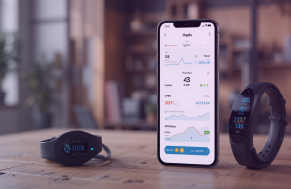
Enhance Your React Native App with Custom Widgets for iOS and Android

In today’s fast-paced digital landscape, providing users with quick and efficient access to essential information can significantly enhance their experience. One powerful way to achieve this is through the use of widgets. Widgets allow users to access important data and functionalities directly from their home screen, making interactions seamless and efficient.

In this article, we’ll explore how to implement custom widgets in a React Native app, focusing on four types: Title, Instant Info, Quick Access, and Personalized Efficiency. I’ll also cover the integration specifics for both iOS and Android.

widgets    4 Widgets

Widget Types and Their Benefits

🔹Instant Info Widget

An Instant Info Widget provides real-time updates on important information. For example, weather widgets offer real-time forecasts, alerts, and location-based information, enhancing user experience with quick access to essential weather details directly from their device’s home screen.

🔹Quick Access Widget

A Quick Access Widget allows users to perform specific actions directly from their home screen, such as launching a particular feature of the react native app or accessing a frequently used section.

🔹Personalized Efficiency Widget

A Personalized Efficiency Widget tailors the displayed information based on user preferences and interactions, making the react native app more intuitive and user-friendly.

Sharing Data with Widgets

To share data between your react native app and widgets, you need to use platform-specific shared storage mechanisms. Let’s take a look at my custom app & its widget.

Custom app and widgets

🔹iOS: Using React Native Shared Group Preferences

First, install the package:

npm install react-native-shared-group-preferences

Then, use the following code snippet to save data on the React native side:

unnamed

🔹Android: Using Native Modules

unnamed

Transform User Experience with Custom Widgets in React Native. Hire Our Developers Now!

Adding Widgets to Your React Native App

🔹iOS: Using Xcode

1. Create a Widget Extension

  • Open your project in Xcode.
  • Select File > New > Target.
  • Choose Widget Extension from the list.
  • Click Next.
  • Name your widget (e.g., MyAppWidget).
  • Ensure your react native app is selected as the Embed in Application.
  • Click Finish.

2. Configure the Widget

  • Open the newly created widget folder (e.g., MyAppWidget).
  • Locate MyAppWidget.swift. This file contains the default widget code.
  • Modify the code to define your widget’s appearance and functionality.

3. Run and Test the Widget

  • Build and run your react native app on a physical device or simulator.
  • Add the widget to the home screen by long-pressing the home screen, tapping the + icon, and selecting your widget.

Below is a snippet of the code that fetches desired data by using the key name on the iOS widget side :

unnamed

unnamed

🔹Android: Using Android Studio

1. Create a Widget Provider

  • Open your project in Android Studio.
  • Create a new Java/Kotlin class (e.g., MyAppWidgetProvider).

2.Define the Widget Layout

  • Create a new layout XML file in res/layout (e.g., widget_layout.xml).

3. Register the Widget in Manifest

  • Open AndroidManifest.xml and add the widget configuration.
  • Create the my_app_widget_info.xml file in res/xml.

4. Run and Test the Widget

  • Build and run your react native app on a physical device or emulator.
  • Add the widget to the home screen by long-pressing the home screen, selecting Widgets, and adding your widget.

Below is a snippet of the code that fetches desired data by using the key name on the widget side :

unnamed

Widget Services

Widgets enhance user experience by offering quick access to real-time information. For example, weather widgets provide real-time forecasts, alerts, and location-based information, making essential weather details readily accessible.

Weather information

Methods in Android Widget

  1. updateAppWidget: Manually called by other methods (like onUpdate, a BroadcastReceiver, or an IntentService) when new data is available.
  2. onUpdate: Triggers the update of all active widgets. Called by the system at intervals.
  3. onEnabled: Initializes resources when the first widget is created.
  4. onDisabled: Cleans up resources when the last widget is removed.

Methods in iOS Widget

  1. getSnapshot: Generates a snapshot of the widget for display in the widget gallery.
  2. placeholder: Provides a placeholder widget entry for display before actual data is available.
  3. getTimeline: Creates a timeline for the widget with entries and a refresh interval.
  4. SimpleEntry: Defines the structure of a timeline entry with a date and a widget key.
  5. widgetDemoExtEntryView: Configures the appearance of the widget using SwiftUI views.
  6. widgetDemoExt: Specifies the widget configuration and behavior using the provider and entry view.
coma

Conclusion

Implementing custom widgets in your react native app can significantly enhance user engagement by providing quick and efficient access to important information and functionalities. By leveraging platform-specific tools and techniques, you can create a seamless and intuitive user experience on both iOS and Android. As demonstrated in the custom example I developed above, you can clearly see how custom widgets can be tailored to meet specific user needs and improve overall react native app performance.

React Native doesn’t natively support widgets. You must use Xcode (iOS) or Android Studio (Android), requiring knowledge of Swift, Kotlin, or Java. Widgets can call APIs for dynamic data, enhancing functionality. This native integration ensures high-performance, feature-rich widgets that leverage each platform’s capabilities.

Keep Reading

Keep Reading

  • Service
  • Career
  • Let's create something together!

  • We’re looking for the best. Are you in?